
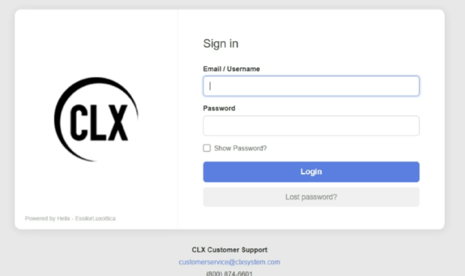
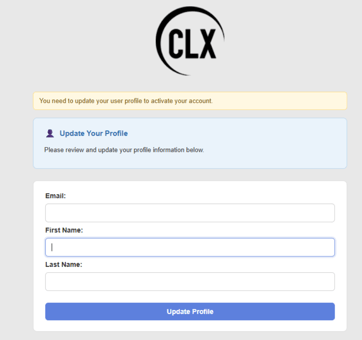
- Step 1 - User will login as normal and be prompted to update their profile (you cannot move forward without putting in a email):
-
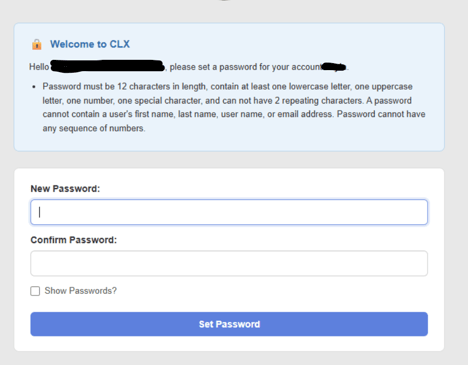
- Step 2 - The next page will appear to update your password:
-
-
Step 3 - Authenticator setup. Scan the QR Code displayed in CLX
- Open your authenticator app and select the option to "Scan QR code" (this may be labeled under a "+" sign or other symbol depending on the app)
- Use your phone to scan the QR code displayed on your screen in CLX (Note: the QR Code is a one time setup).
- If you would like to use a device other than a cellphone, please see this page --> https://help.helixsolution.com/en/clx-customer-success-center/authenticator-options
-
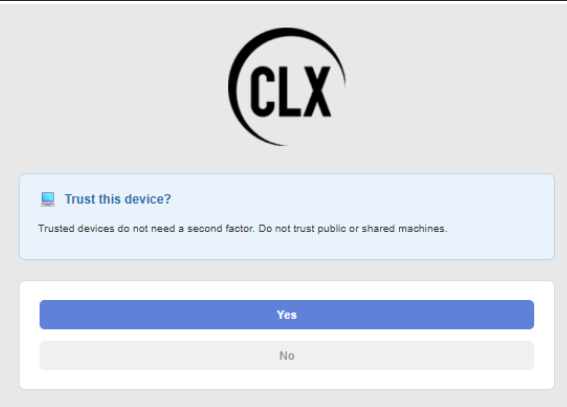
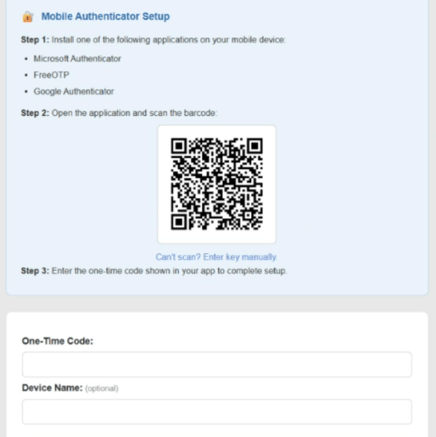 Device Name can be named anything to help you remember which device you are on.After a user has logged in to MyCLX, they will not have to use the authenticator again for 45 days. On the next login they will be presented with Trusted Device page and will not have to enter a code at each login. The user will select Yes and then OK on the screens shown.
 Still have questions? Check out our FAQs on CLX MFA here.